
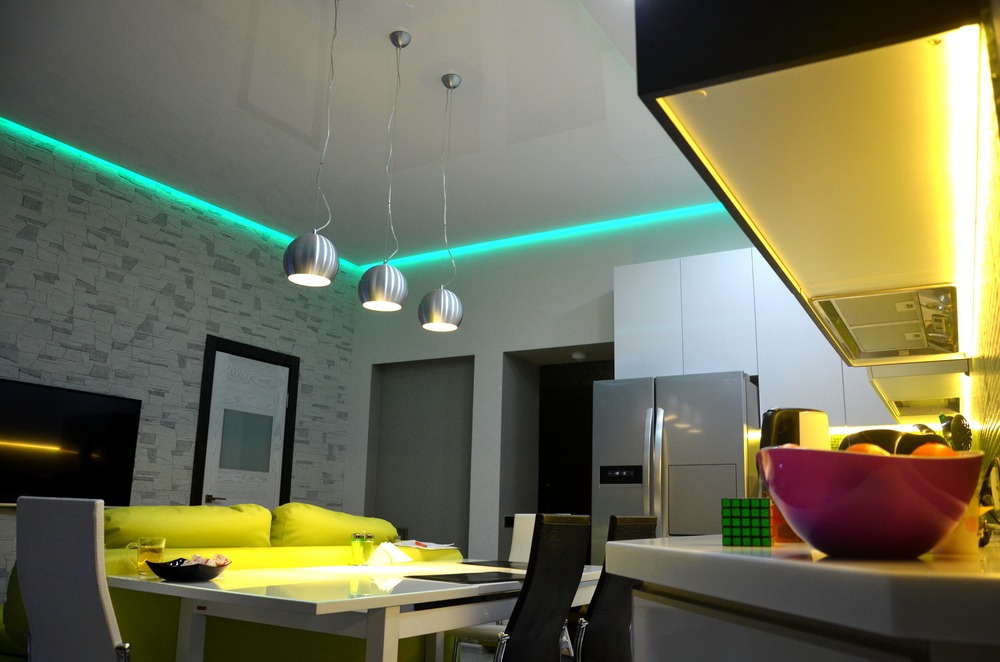
LED lighting is the new trend. If you want a cool, modern and aesthetic appearance in your room, then LED lighting can do the job. It adds more brightness and vibrancy to the room.
These lights can easily be bought from any electrical shop. However, these can be expensive.
In order to ensure that the benefits of LED lights are availed, it is necessary to install in the right manner.
This article will guide you over the steps which you need to perform in order for proper LED lighting installation:
1. Cut the Strip
The first step is to cut the LED strips properly. This will entirely depend on the length of the light you need.
Therefore, figure out the length of the strip which will be attached to the surface. The strip should be cut with proper equipment to ensure that the same is not damaged.
2. Cable Connection
A solderless clamp should be used for connecting the wires to the strip. The strip thereafter should be pushed into the clamp’s short end.
Subsequently, you should match the colored wire with the corresponding letter which will appear on the LED strip. This will appear on the clamp’s other end.
However, it is important to note that this may not be in the same order.
Therefore, you might have to do some rearrangements. The clamp should be then pinched tight. There is no need for stripping the wires.
3. Controller Attachment
The controller is essentially a piece of equipment that gives you control over changing the color of the lights or making them less dim.
If you are using LED lighting which changes colors, then you will need a controller for its operation.
The colored wires should be stripped and aligned with each other depending on the corresponding port which will appear in the controller. The screw then should be tightened in order to clamp the same into place.
4. Mounting the Lights
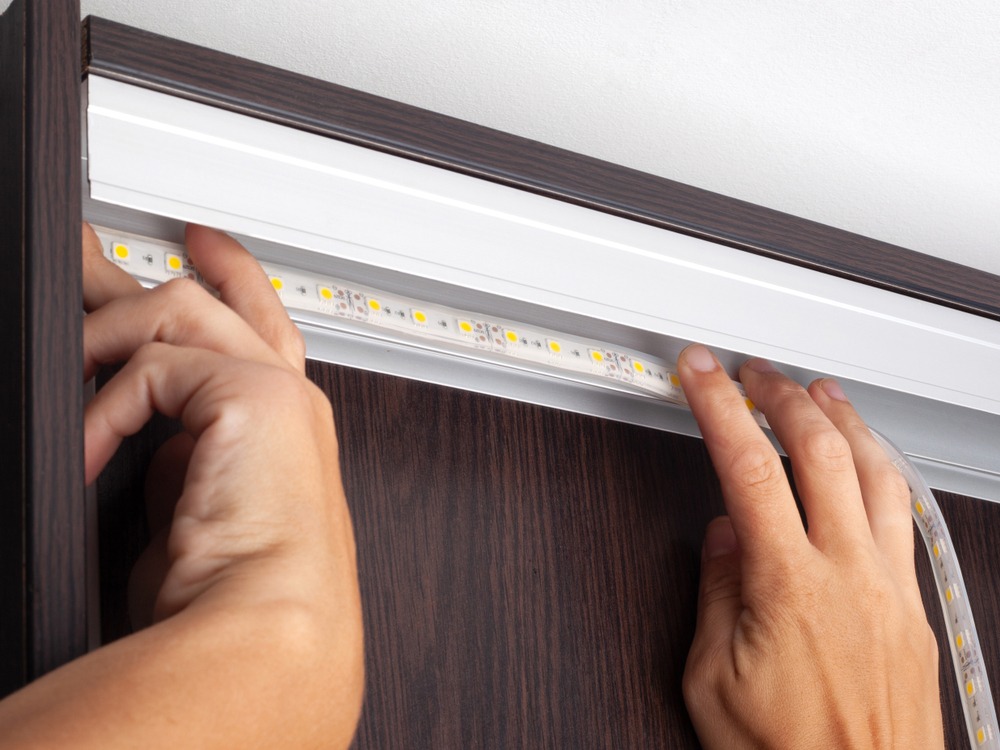
The next step is to mount the lights. The adhesive backing of the LED lighting should be peeled away.
Once this is done, you can stick the lighting wherever you want to.
An aluminum channel can be used if the lights are not supposed to be hidden completely. The channels are made for the accommodation of different LED lighting strips.
It also comes with a frosted lens. This enables it to feature a more finished and aesthetic appearance.
5. Power Up
The final step is to power up the lights. If the LED lighting is connected to a 12-volt system, you should connect the negative and the positive with 12-volt leads with the controller.
If these lights are installed in your house only, then the controller is to be plugged into a transformer. Such a transformer is plugged into the outlet.
This is how the entire LED lighting system will lighten up.
How Do I Purchase the Right One?
It is essential to purchase high-quality LED lighting.
Fortunately, there are many ways in which you can ensure that the right purchase is being made.
Following are some factors you must consider before purchasing:
- Get those LED lights that are weatherproof. In the event your lights are exposed to water or moisture, they should have the ability to resist it. Check the waterproof or weatherproof rating of the light.
- As mentioned above, a controller is needed for those lights which can change its color. Therefore, choose LED lights that can change lights. This will give you the ability to set the surroundings as per your need.
- The voltage of the light shall meet the voltage of the source of power. Therefore, consider the voltage before purchasing any light.
- LED lights come in different brands. Look out for reputed brands. Furthermore, consider the price of the light. High-quality lights are normally expensive but the results are much better than cheaper lights.
The Bottom Line
Above is all you need to know about installing and purchasing LED lights.
If you are considering the installation of the same, you should know about these things. This will ensure proper purchase and installation.
You can even hire professional services who can install these lights.
Comments are closed.