
Some of the most used tools in a handyman’s arsenal are the drills and drivers. However, organizing the drill bits, batteries, and chargers can be a little complicated. Having to store the auxiliary attachments doesn’t help either. Whether you have a garage or have built a shed, they are usually a great source of clutter on our workbench, that’s why it’s best to separate them from the rest of the pack.
If you have two hours and 50 bucks to spare, you can make your own drill dock organizer. The best part is that this thing doesn’t even require a lot of skill to put together. So if you’re a pro, you can probably do it with time to spare. And you might get some ideas to customize it further.
The basic steps
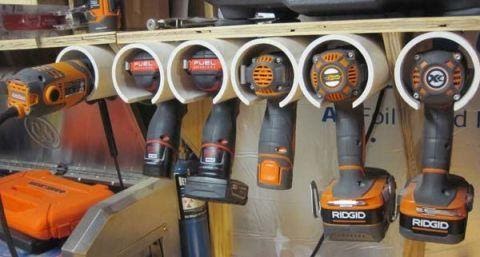
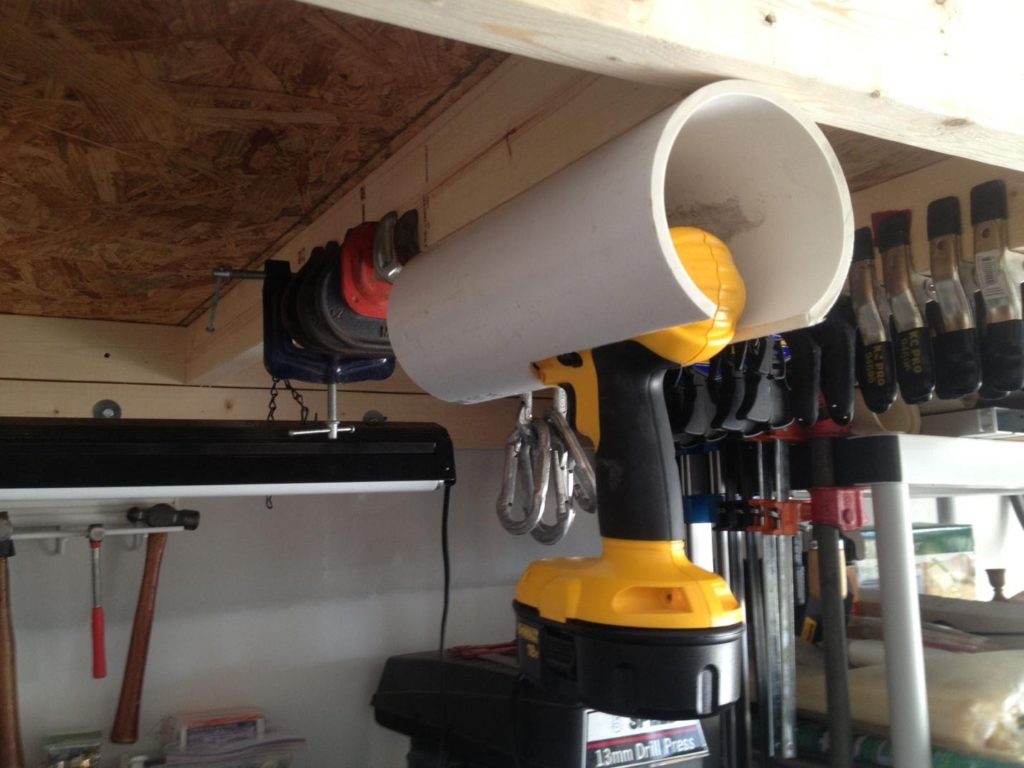
First of all, you need to determine the width of the pipe slot by measuring the width of your drills. You can do this with a clamp to make the process easier. Then use the clamp to mark the spots on the PVC pipe. Make the slot about 1/8 inch wider than the tool handle. This will help you set the drill in place without much hassle.
Get a metal-cutting blade and saw off the slot on the pipe. After cutting, ease the sharp edges with a file or sandpaper. Do this for each tube. Organize them in the order in which you want to organize your tools. Next, you will have to mount the resulting PVC holsters on a wooden board.
Drill holes in the pipes and fasten each with at least two screws. If you prefer, you can also mount them on a metal board, in which case you might want to make your job easier with the right cobalt drill bits.
The finishing touches
Finally, you can mount the board on an existing shelf, or you can make your own. Since PVC pipes come in all shapes and sizes, choosing one that can holster your drill correctly won’t be a problem. You can usually find such pipes for less than 20 dollars. And if you need shorter pipes, the cost will be even lower.
Usually, we recommend making the holsters 12-inch long, but you can go slightly shorter. However, don’t make them so compact that the drill head might slide off and fall on the floor. Remember to take care of your tools the same way you would take care of yourself. After all, they’re the ones that help you work efficiently.
Also, don’t forget to leave enough room between the holsters so you can grab each drill comfortably. We’d recommend placing the holsters 6-1/2 inches apart from one another. This will allow you to comfortably reach every drill without bumping into the one next to it, even if you have big hands.
You might also want to consider getting a power strip. This will allow you to charge your drills when they’re not in use. It might also come in handy if some of your drills are corded, and you need to work in the immediate area.
Finally, you can make markings on the top part of the dock to organize drill bits and other accessories accurately. There’s no exact way of doing this, so you can just use your imagination. Think about what pieces you need to grab most times for your projects. Use markings to separate said tools appropriately.
Final thoughts
Now that you know the basics of building a drill dock, you can fix and fit everything to your needs. If you’re used to projects like these, you might even have a few ideas on improving the overall design.
For more great home ownership tips, check out the other blogs on Check This House.
Comments are closed.