
10 Tips on How to Use Free Shed Plan and Build an Outdoor Storage Shed
Even if you’re not a skilled carpenter you can build a shed by sticking to the plan described below.
There are ten easy steps you should follow after downloading this free shed plan. Even if you’re not a skilled carpenter you can build a shed by sticking to the plan described below and inside the “free shed plan” file. If you didn’t have a chance to download it from “My shed plans decision” post, click on the shed picture to the left and get it now – no name or registration needed.
Free shed plan tips
1. Before starting with free shed plan visit your local building / zoning department and determine the requirements for building an outdoor storage shed on your property. There are a couple of ways you can do that:
- Visit the website of your local building / zoning department, this is how I did it in my area: open www.Google.com (I always get the best results using it)
- Type into the search box: Vernon Hills IL shed (replace Vernon Hills & state abbreviation with yours)
- Click “Search” or hit “Enter” on your keyboard and examine the results – my answer was in the first position. Go over the page / article that answer your questions.
It might not be as easy as it was for me, if you can’t find it, you should give them a call or personally visit the facility. Before you go to there, print the free shed plan and take it with you, so you can ask if any alteration would be necessary to comply with the local code. At the same time you can apply for a permit if such is required in your jurisdiction.
 2. Once you know all the requirements you can start proceeding with this project and begin using free shed plan. First decide where you’re going to build the storage shed. Its maximum size (floor area) will be determined by the building department and is usually described as a % of the size of the land and any structures standing on it. The free shed plan has 96sq feet of the floor area (12’ x 8’).
This is how it ‘s regulated in my jurisdiction: “The shed and/or modular storage unit area, when combined with the area of other structures in the rear yard, shall not exceed forty (40) percent of the required rear yard area.”
3. Based on the material list from the free shed plan (pages 3-6) and additional guidelines provided by the building department, make a trip to the lumber yard or a local home improvement store. You are going to need a larger size vehicle or have the materials delivered – the free shed plan longest lumber piece has 14’ (roof ridge board) and there are 4’ x 8’ plywood sheets as well. Get everything at ones so you don’t waste time running back to the store once you start working on this project.
4. Once you have all the shed materials on site, start the free shed plan project by leveling the ground and preparing to lay the foundation. Make sure to prepare the foundation exactly as described by your local building department, don’t rush with the framing work (Free Shed Plan: page 16 has one of the possible options). If using piers or a slab to support a shed, a pre-pour concrete inspection may be required before you proceed with the construction process.

 5. Once the foundation is ready, start building the floor frame (Free Shed Plan: page 16) and the side walls as described in the free shed plan. It’s much easier and faster to build wall sections on the ground / flat, lift one up when assembled, and secure to the foundation / floor platform.
Pressure treated 2”x4” for the wall bottom plates are not included in the free shed plan material list (regular type lumber has been listed instead). However, I’d highly recommend this upgrade for two reasons:
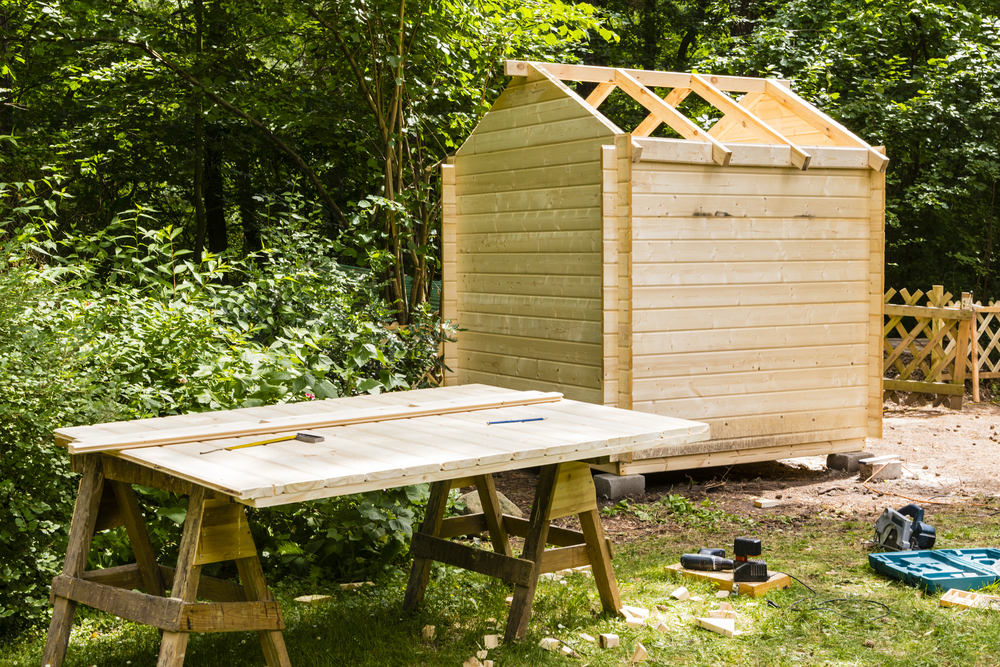
6. After securing all four walls in place, cut the first of the roof trusses and use it as a template (Free Shed Plan: page 17-18). Follow the roof framing steps and by the time you nail the last member in place your project will have a complete shed frame ready.pressure treated lumber is often required for the wall bottom plates wall bottom plates are exposed to moisture and using pressure treated wood will prevent or at lest significantly slow deterioration
7. The next step is to install the fascia boards, roof sheathing / plywood & roofing material – asphalt shingles – those steps are outlined on page 19 of the free shed plan.
8. Shed soffit, plywood siding, and trim will follow the shed construction procedure. Although the free shed plan lists plywood siding as the wall finishing material, you can use any available material that pleases your eye and for example matches your home’s exterior walls – use your imagination.
If you stick to this free shed plan and use unfinished plywood siding, make sure you apply some wood protection over its surface. A couple of coats of exterior grade varnish or paint will protect your project for years to come.
9. The free shed plan lists the materials and describes how to build the windows and doors as well. However, if you’re not up to this challenge, you can purchase prehung windows and doors that can be easily installed by following manufacturer’s directions. As necessary, paint or varnish them to prevent moisture penetration and material deterioration
10. The storage shed entrance ramp is the next step, it is an optional free shed plan chapter, and it might not be necessary. In most cases it would depend on the grading and floor level distance from the ground at the entrance to your shed. If you think that you can benefit from having a ramp installed, assembly is simple and it will not take long.
Congratulations! You should be proud of yourself, especially if this free shed plan was your first project of this magnitude.
Comments are closed.