Anytime house maintenance explains a few of the house components that do not necessarily depend on seasonal preventive repairs. Of course, based on your observation of those components, and their quality, you can implement some kind of a schedule that will help in monitoring and servicing.
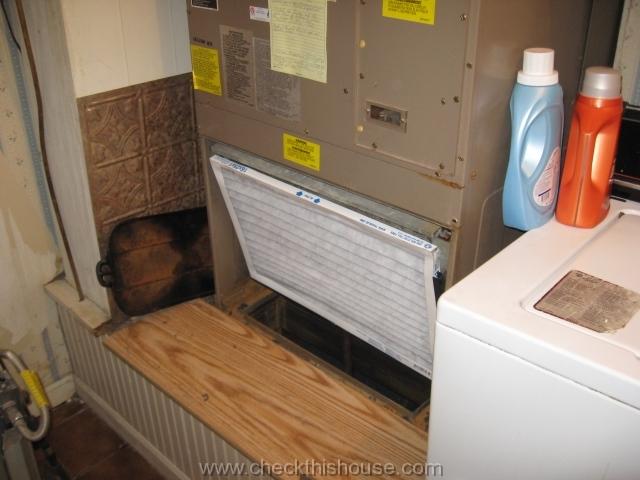
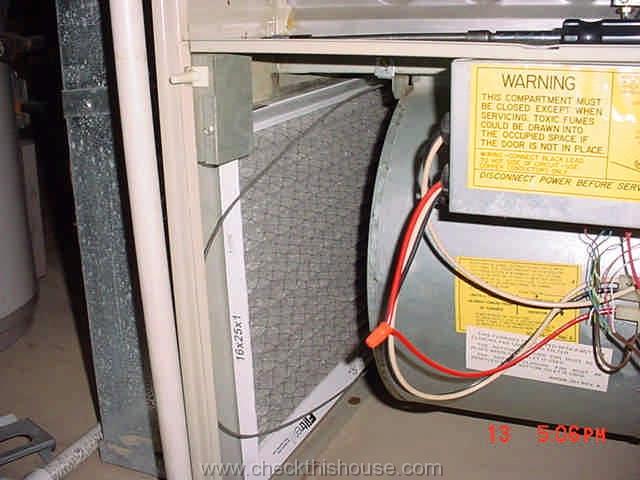
1. Change or clean your forced air heating / AC system filter every 1-4 months based on type and usage.


The reason to list HVAC filter replacement under the “anytime house maintenance” is that its performance depends on type (mechanical / media air filters and electronic air cleaners), quality, usage (amount of time you run HVAC system), cleanliness of your house, condition of the air ducts, etc.
There might be some longer periods of time your HVAC system is not running at all, and the air filter replacement per schedule or per its manufacturer recommendation would be just wasting of money. On the other hand, if your HVAC system runs very often, make checking the air filter a routine for a few months – after some period of regular monitoring you’ll be able to work out a schedule.

 If you let the dust particles to accumulate on the air filter surface, your HVAC system will have to run longer to condition the air within your house. Air conditioning coil icing might develop and clog your system / cause its damage.
2. Replace caulking / silicon around your tub, shower stall and sink whenever it starts separating from surfaces.
![]()
 You could schedule this next anytime house maintenance item based on the caulking / silicone warranty label (25, 35, 50 years), but only if applied in… laboratory conditions. Real life applications don’t last that long, not even close.
Frequent cleaning, running water over it, applying pressure to the seams, structure contraction / expansion, and often improper application of caulking and silicon cause it to separate from the surface. This will eventually result in water / moisture penetration and by the time you notice some stains on the ceiling below or in any areas surrounding that leaking enclosure, there might be already a significant damage inside the wall (including mold contamination).
3. Inspect your bathroom tiled walls for cracks and missing grout – fill the gaps as soon as possible to prevent water penetration and tile backing wall damage.
![]()
 This second bathroom maintenance item actually applies to all tiled and grouted surfaces through your house. However, tiled walls and floors in the areas often exposed to water have the priority. Properly applied and sealed grout between the tiles that are firmly secured to a solid and stable surface will last a long time.
While cleaning the bathroom or taking a shower; follow the grout lines and look for missing grout, hairline cracks. Pay close attention to the corners and seams – those are the most common areas for the cracks to appear and the grout to become loose. If it is cracked – cut / remove the old grout, clean the area well, and fill the joints with a new compound. I don’t recommend applying it over an old and contaminated grout – you’ll be wasting your time.
There is one grout type that has very low maintenance requirements, I have personally used it in my bathrooms and I highly recommend it because of its durability, and mold /stain resistance. It’s epoxy based grout – SpectraLock by Laticrete International, Inc., much more expensive than the regular grout, more difficult to apply, but performs perfectly (I’m not associated with this company in any way – it’s just my personal opinion).
4. Periodically check the main water shutoff valve and individual plumbing fixtures valves – might leak if left untouched for several years, might not operate at all and start leaking if you force them to turn. If it turns freely, open it all the way, and then back up a little – this helps to prevent the valve from being stuck.
 If this is the first time (in an older house) you’re trying to test your water shutoff valve – be prepared for a leak, and it could be a heavy one. That’s why routine house maintenance is so important; imagine your kitchen faucet seals start leaking suddenly, water spilling allover the floor, the handle on the water shutoff valve under the sink breaking (because it has never been turned / tested), and the main shutoff valve is frozen / stack in fully open position…
Be gentle on those valves, especially the plastic ones are extremely fragile, it is very easy to break the handle and the stem assembly, which could result in leakage. Before you start testing individual plumbing fixture water shutoff valves, make sure that the main water shutoff valve is fully functional so you can turn the water off in an emergency.
Just in case it leaks – prepare a tray or bucket (better have two than one), some towels to collect water, and have an emergency plumbing service number ready. The valve should turn freely, if it is frozen in place – I’d suggest calling a plumber. You can try to apply some pressure using a wrench, but the results are unpredictable if you overdo it… and I don’t know how much of that pressure is too much.
If the valve handle is missing, provide one if possible, or replace the valve so it can be operated.
5. Periodically check your house water heater for leaks, especially if it is beyond the warranty period. Watch for stains / dripping water on WH walls, inside the burner chamber (if accessible / some are sealed), under the appliance and on any accessible pipes.

 There’s really no way of predicting the water heater failure; my own WH flooded the entire house floor the day after its 6 year warranty expired. However, during my inspections I often see 15 – 20 years and older water heaters that show no signs of corrosion or leakage.
Assume that it can happen suddenly and without any announcement, consider drip pan installation under the WH (plumbed to the drain) – a must have feature on above ground (upper floors) installations, and highly recommended in any location.
6. Observe and listen to your appliances during their cycles, if it doesn’t sound right – investigate.
Most appliances produce some distinctive noises during operation, or some might be almost noiseless. If something changes in their behavior, act upon it, maybe there’s nothing serious, or it could be the beginning of some critical condition.
Maybe you have an idea of some “anytime house maintenance”, I’d appreciate your comment.


Comments are closed.