
Proper House Sump Pump Installation & Maintenance Checklist
The most common house sump pump locations are basements or crawlspace corners, but you’ll also find them in garages and exterior wells!
House Sump Pump Installation
“Pump in the hole / house sump pump”, is just another component of our precious home that we tend to forget about. I know that for a fact because house sump pump installation is a very popular item in the “servicing required” section of my inspection reports. Wake-up call from a broken house sump pump in your basement or crawlspace may be sometimes very painful (wet and expensive), so bare with me for a few minutes.
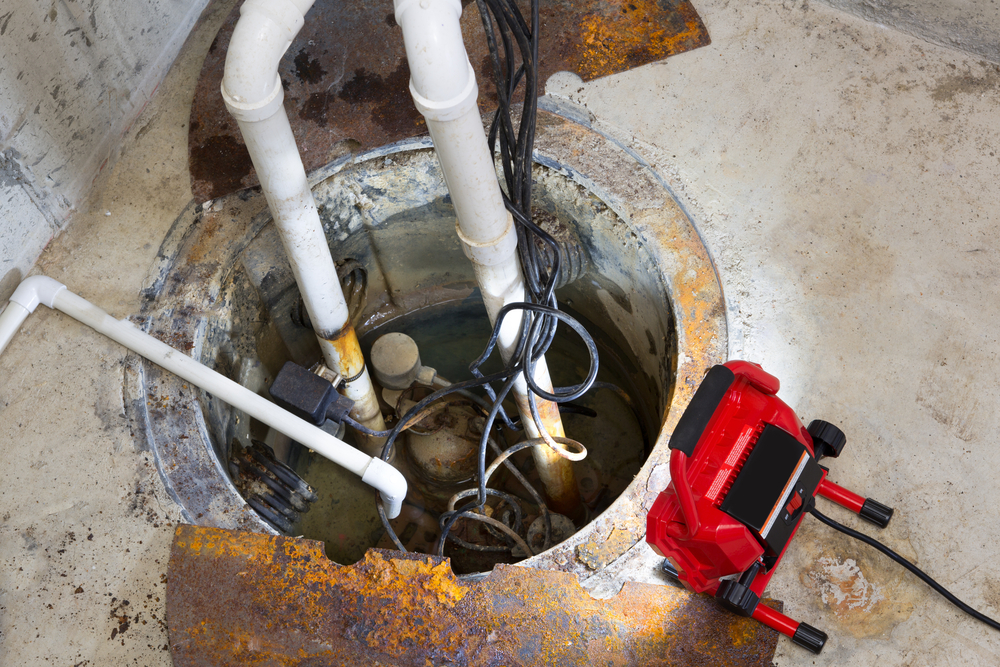
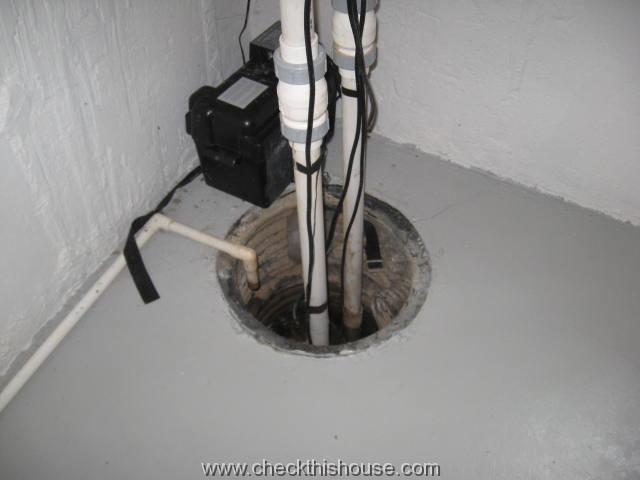
How an entire drainage system around and inside your property is designed will go into another post, for now I’m assuming that you don’t care what’s under the ground. The most typical house sump pump installation is visible on the pictures and you can compare if what you see here is what you got at your place. A house sump pump installation basin / well / pit might be located in various areas, sometimes it’s not even visible.
The most common house sump pump locations are basements or crawlspace corners, but you’ll also find them in garages, exterior wells, under the carpeting in finished basements (sometimes pipes might be hidden completely), or elsewhere.
![Missing cover on a house sump pump well poses safety hazard]()
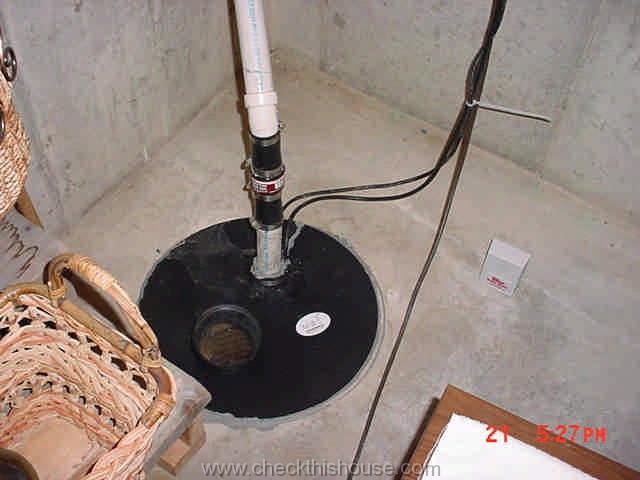
![Two piece plywood cover on a house sump pump well]() House sump Pump Installation – Well Cover
House sump Pump Installation – Well Cover

If the house sump pump well is located in an exposed area, easily accessible, even in the dedicated closet, make sure that opening is well protected. This is extremely important when small children are occupying or visiting the premises – make sure that your house sump pump cover is in place and installed in such a manner, that stepping on it will not displace it (secured with screws would be ideal but some of the setups don’t have room for screws).
This might be difficult when a back-up sump pump and an additional discharge pipe is added to the pit. The easiest way to solve this problem is using a two piece / cut in half cover, or installation of a “Y” shaped connector for both sump pump discharge pipes just below the cover (in such house sump pump installation, you’ll have two sump pumps but only one discharge pipe penetrating the cover) – of course, only if the well is deep enough to accommodate such installation.
Just in case Radon gas is an issue – house sump pump well and cover penetrations must be sealed air tight!
House Sump Pump Installation – Water Discharge

 A PVC pipe is the cheapest, easiest one to service, assemble, replace, or whatever you wish to do with it. But … because a house sump pump motor vibrates, glued PVC pipe connections tend to separate, so they should be well supported, secured, and monitored periodically. Older sump pump discharge assembly might be galvanized or copper pipe; eventually corroding and sometimes leaking. Some people also use flexible hoses, which I personally don’t recommend.
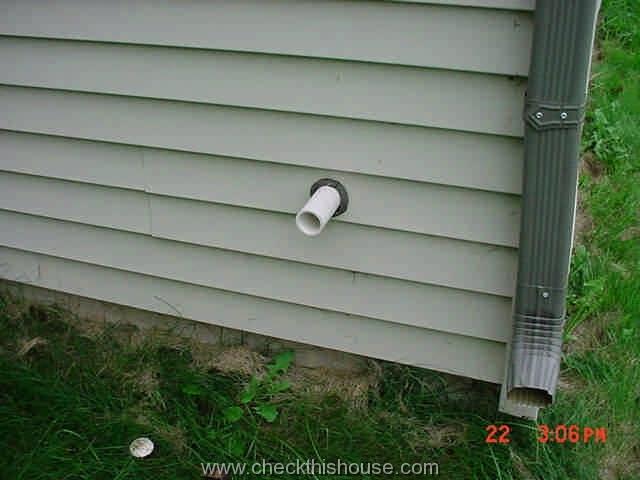
Flexible discharge hoses used on house sump pump installation are perfect for the exterior of the house, where they rest fully supported on the ground. They simply extend the house sump pump discharge pipe as far as possible from the foundation (don’t let it discharge next to you foundation).
However, inside the basement, sometimes suspended on a few straps from the ceiling or in vertical runs, a flexible pipe might easily separate at connections – every time the house sump pump motor is activated, water pressure puts significant stress on such assemblies.
Also, flexible pipe wall is soft and easy to puncture, which isn’t that important on exterior, but in the basement might create a small disaster.
House sump Pump Installation – Discharge Pipe Check Valve

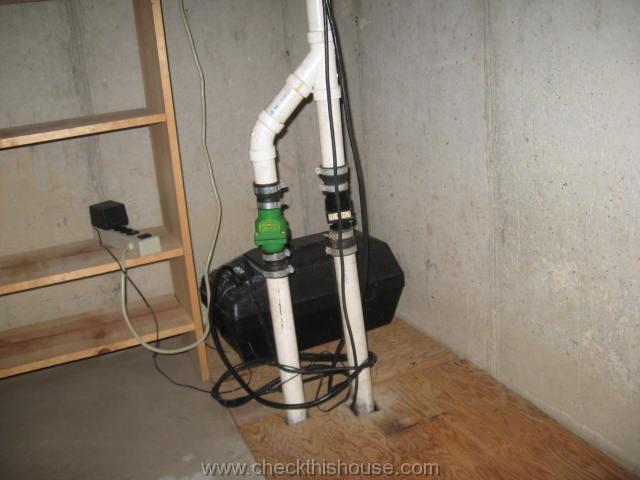
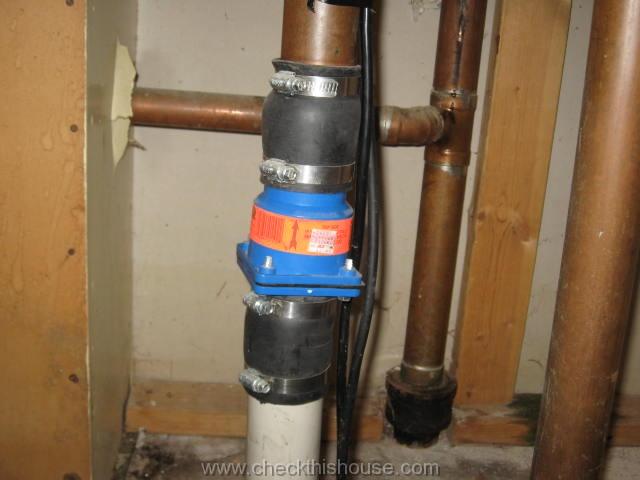 Check valve is a device installed on the discharge pipe, usually within a few feet above the sump pump cover. House sump pump installation check valves come in different “shapes” (elongated, usually thicker than a discharge pipe, made out of plastic, rubber, brass or combination – you can see a couple of them on the images.
Despite the check valve’s shape, they always have the same purpose – to prevent water remaining in the discharge pipe from flowing back into the sump pump pit after being pumped out.
For house sump pump installations discharging to the exterior and having very short runs, such device doesn’t really change / help much. Small amounts of water backing up to the sump will be harmless; on the other hand, during the winter, water trapped inside the pipe (if you forget to disconnect extension on exterior) will freeze and crack the pipe.
This might sometimes happen inside or at the exterior wall penetration. Therefore, remember to remove this extension or make it shorter and keep it above the ground for the cold season.
- Sloped towards the house sump pump if no check valve installed
- Sloped towards the ground on exterior run with the check valve installed
However, for the house sump pump installation connected to the city sewer systems this check valve is necessary to prevent sewer from backing up into the sump pit (some jurisdictions banned such connections to prevent rain / ground water from flooding city sewer systems, so check with your local authorities before you make such connections).
Inspect sum pump check valves occasionally for leaks, they usually occur on connections to discharge pipes, but sometimes the center section may also separate and start leaking.
One more thing:
If you are about to install a house sump pump discharge pipe check valve or replace a defective device, make sure that it is installed the proper way – there should be an arrow on the body of the check valve, which reflects water flow and it should always point out / away from the pump. Disconnect the sump pump power supply cable before the procedure!
Tip – if the discharge pipe between the house sump pump and the exterior wall has a horizontal section, try to secure it with a little slope towards the house exterior, so even without the pump running, the pipe will empty itself to the exterior and prevent freezing during the cold season (with check valve installed).
The House Sump Pump Installation Itself
Make sure that the sump pump sits on a solid base. Older basins might be bottomless and filled with debris which could damage / block the pump rotor – clean the basin, set the sump pump on some bricks or concrete tile so it is picking up water only.
DISCONNECT THE SUMP PUMP POWER CORD BEFORE YOU PERFORM ANY SERVICING.
There are two basic sump pump types:
House Sump Pump Installation – Pedestal Sump Pump
It has a motor suspended above the water – this one should newer be submersed, it is usually activated by a switch mounted on the motor and connected to the floating material (Styrofoam, rubber / plastic ball) inside the basin, rising water pushes up the floating material and activates the switch.
House Sump Pump Installation – Submersible Sump Pump
Submersible sump pump has to be under water for proper cooling, it is activated by either a floating or pressure switch. A floating switch looks like a ball at the end of a short wire attached to the pump. A pressure switch is attached to the pump body bottom section.
Floating switch needs to float freely so make sure that it’s not suspended inside the basin or tangled with / blocked by the sump pump wires or pump itself.
If you’re planning a weekend project and need advice on a house sump pump sizing, this publication by University of Illinois Extension – College of Agricultural, Consumer and Environmental Sciences might be helpful.
House Sump Pump Installation – Testing Procedures
The most “real-life” approach would be to fill-up the house sump pump well with water, but sometimes it might take a long time and waste lots of water – look inside the well for openings on the side walls. If they are located close to the top, much higher then the pump or floating device itself, it shouldn’t take that long. But if they are low, at pump level, you might need to flood drain tile underneath the entire house first before water level raises inside the well and activates the sump pump.
If you have a floating switch, just lift it up and the sump pump should start – for pedestal pumps you can just lift the switch arm mounted on the motor, for submersible, use some kind of a wooden or plastic stick to lift the floating ball.
Don’t put your hands into the water!
Sump pumps are insulated and should not under any circumstances pass electricity into the water. However, it happened to me once … I was lucky because the basin was dry, and I touched the sump pump enclosure only.
When your house sump pump starts running, look into the well to make sure that it is actually pumping water out; there might be a faulty check valve, clogged discharge pipe on exterior, broken impeller, or other things that will prevent discharge.
Testing house sump pump installation controlled by a pressure switch
 You begin with the first method (well flooding), or unplug the electrical cord from the receptacle – if there’s a small tubing protruding from the plug, you can try to suck out the air from that tubing – it is connected to the pressure switch (wipe the surface, there might be some oily substance on it), seal it fast with your finger and plug it back in, the sump pump should start working and you can release your finger from the tubing.
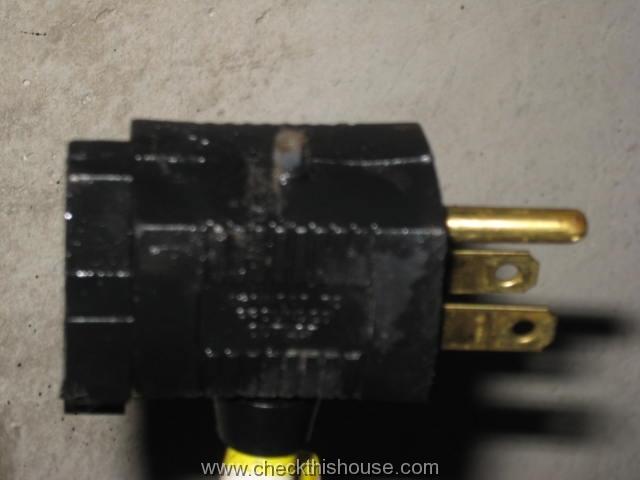
Some of the house sump pumps are designed with double electrical cord / plug – one supplies power to the sump pump and second to the floating switch. What you can do is to separate plugs, and plug in a single plug into the outlet (one without the receptacle). This will test the sump pump motor only, and not the switch – after testing, return the plugs to original configuration for the system to operate properly.
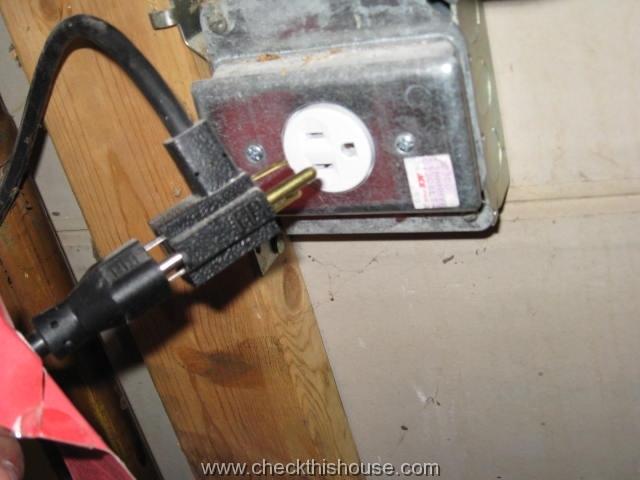
- Use dedicated circuit / outlet for the house sump pump, plug the pump directly into the electrical outlet. Since 2008 a GFCI protected circuit is required for the sump pump (more here: house sump pump GFCI). This new law makes sense and it is an important safety issue, however, GFCI might trip when the pump is needed the most …
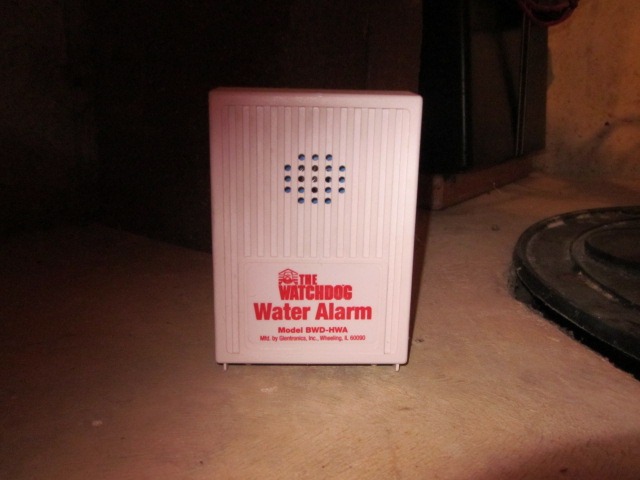
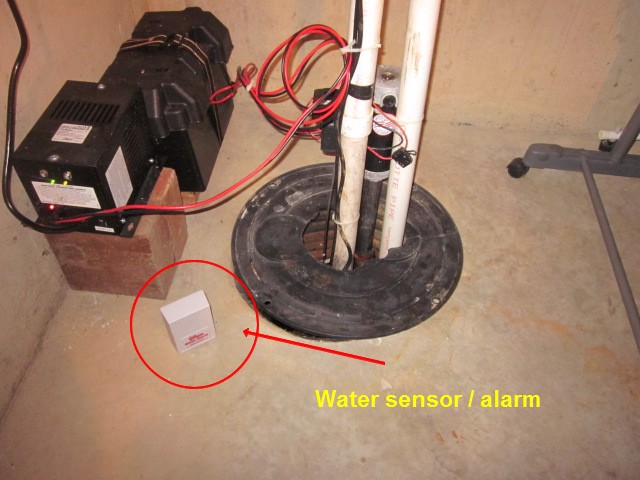
- Install water sensor with an audible alarm / place it on the floor surface next to the sump pump
- Finally, get a battery operated sump – backup pump, just in case the power goes off … unless you have a generator.
Most common house sump pump installation problems / reasons for the sump pump to stop working or performing properly:
- loose electrical power cord plug
- tripped breaker in electrical panel, blown fuse or tripped / failing GFCI outlet if used for circuit protection not responding floating switch (blocked / stuck in “down” position, damaged)
- damaged / jammed house sump pump impeller
- broken impeller shaft
- damaged / burned out sump pump motor
- clogged intake (base of the sump pump), check valve or discharge pipe
- frozen discharge pipe on exterior (for the cold season disconnect exterior extensions, and check discharge pipe end for ice buildup)
- air-locked house sump pump – it operates but not pumping water out, which usually happens when relief hole (small hole that should be drilled in discharge pipe, above the sump pump but below the well cover, gets clogged or hasn’t been drilled at all (should be 1 /16 in. to 1 /8 in. in diameter)
Don’t ever connect your basement bathroom, kitchen or laundry drain to the house sump pump well – ejector pump must handle it (assuming that you have an overhead drain)!
Comments are closed.